So after my last post about the challenges around being able to effectively map network drives from Intune I tried a couple of the options that I mentioned – and with mixed results
Option 1 – DriveMapping ADMX
This is relatively straight forward to setup in Intune as you just need to download the ADMX file (from here) extract it to a folder and import that into Intune by going to the Intune portal, then Devices > Windows > Configuration Profiles > Import ADMX. Clik the Import button and import the ADMX and ADML files you extracted
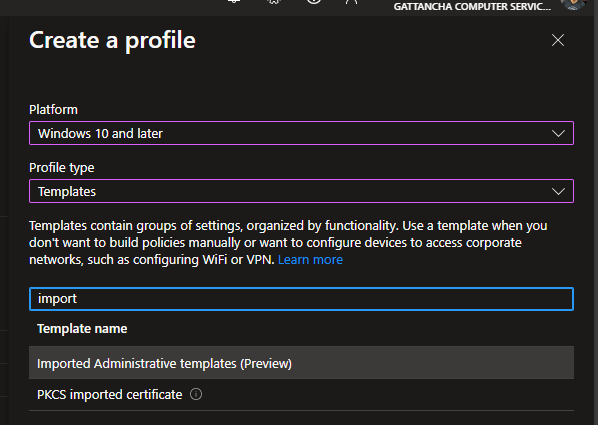
Once done, create a new policy > Windows 10 or later > Templates > Imported Administrative Templates (preview)
 ]
]
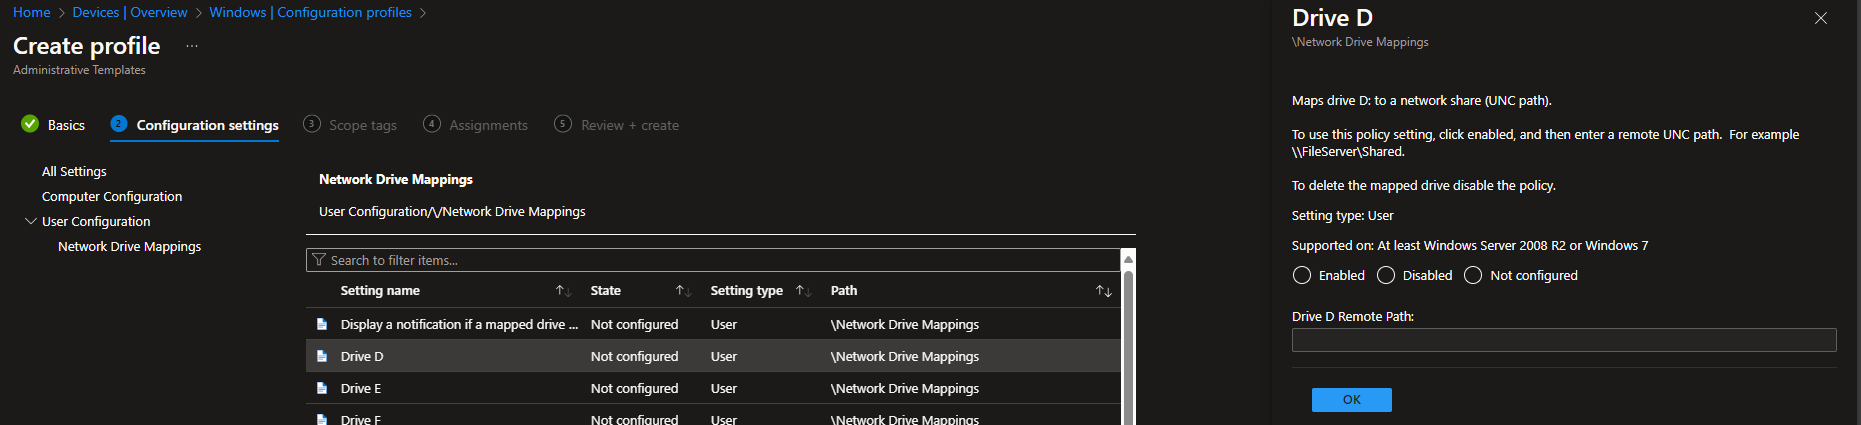
Then you can configure the drives you need using the templates options
Option 2 – Intune Drive Mapping Generator
Again, this one is relatively straight forward to do
Firstly, in Group Policy Management console, find your existing GPO for your drive mappings, then save it as a report in XML format.
Then, goto Intune Drive Mapping Generator browse for your exported XML file, then click on Upload
The site should then display all the mapped drives in that file
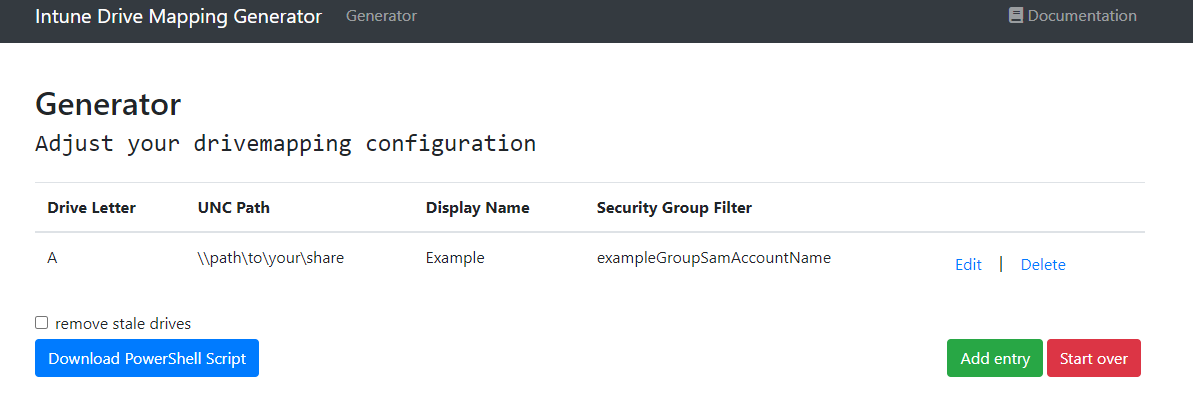 Here you can verify that the drives are correct, edit them if needed, and add new drives as needed. Once you are happy, you can download the Powershell script. The remove stale drives option will also remove all mapped drives not in the script so be careful selecting this as it will also remove any drives mapped outside the GPO and/or script
Now, all you need to do is create a new script deployment in Intune and deploy it to your devices – not users!. The reason for this is that the script works by creating a Scheduled Task on the target device, that then runs at each login.
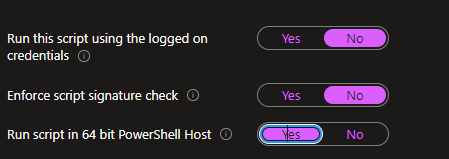
Further to this, you need to apply the following settings for your script to allow it to create that schedule
And that is it – every time the user logs in, the script will run and re-apply any missing drives.
So Which One?
As always, this is up to you based on your environments, but for me, I find the Generator script works far better than the ADMX one.
In testing, I found that whilst the ADMX does work, it has some limitations – firstly, it does not “prettify” the Display Name, so you get a drive name of “shareddrive \\path\to\share (X:)” whereas the script renames the drive the same way you could in Group Policy
But, my biggest issue with the ADMX approach, was that during testing, I found that if anyone manually disconnected a drive, that drive DID NOT reapply again – no matter how many times I resynced or logged off or rebooted, the missing drives just never re-appeared again
The PowerShell script, alleviates this due to the Scheduled Task – but only during login.
The script also doesn’t remove the existing drives first – it only does that if a drive is not in the script – so if you rename a drive, it will not apply that new name, until you disconnect the existing drive.